During one of our in-class projects, I worked with a group in creating an “anything” speaker – while some groups had to create projects that were large or small in scale, ours could take any shape that we saw fitting. So, naturally, we decided that we would put together a speaker that looked like a cactus, and we called it “cactus speaker.” For this speaker, our goal was to create an experience that had lots of variability in sound protrusion through the various “arms” of the cactus and the level of noise relative to the location of the driver within the cactus shape.
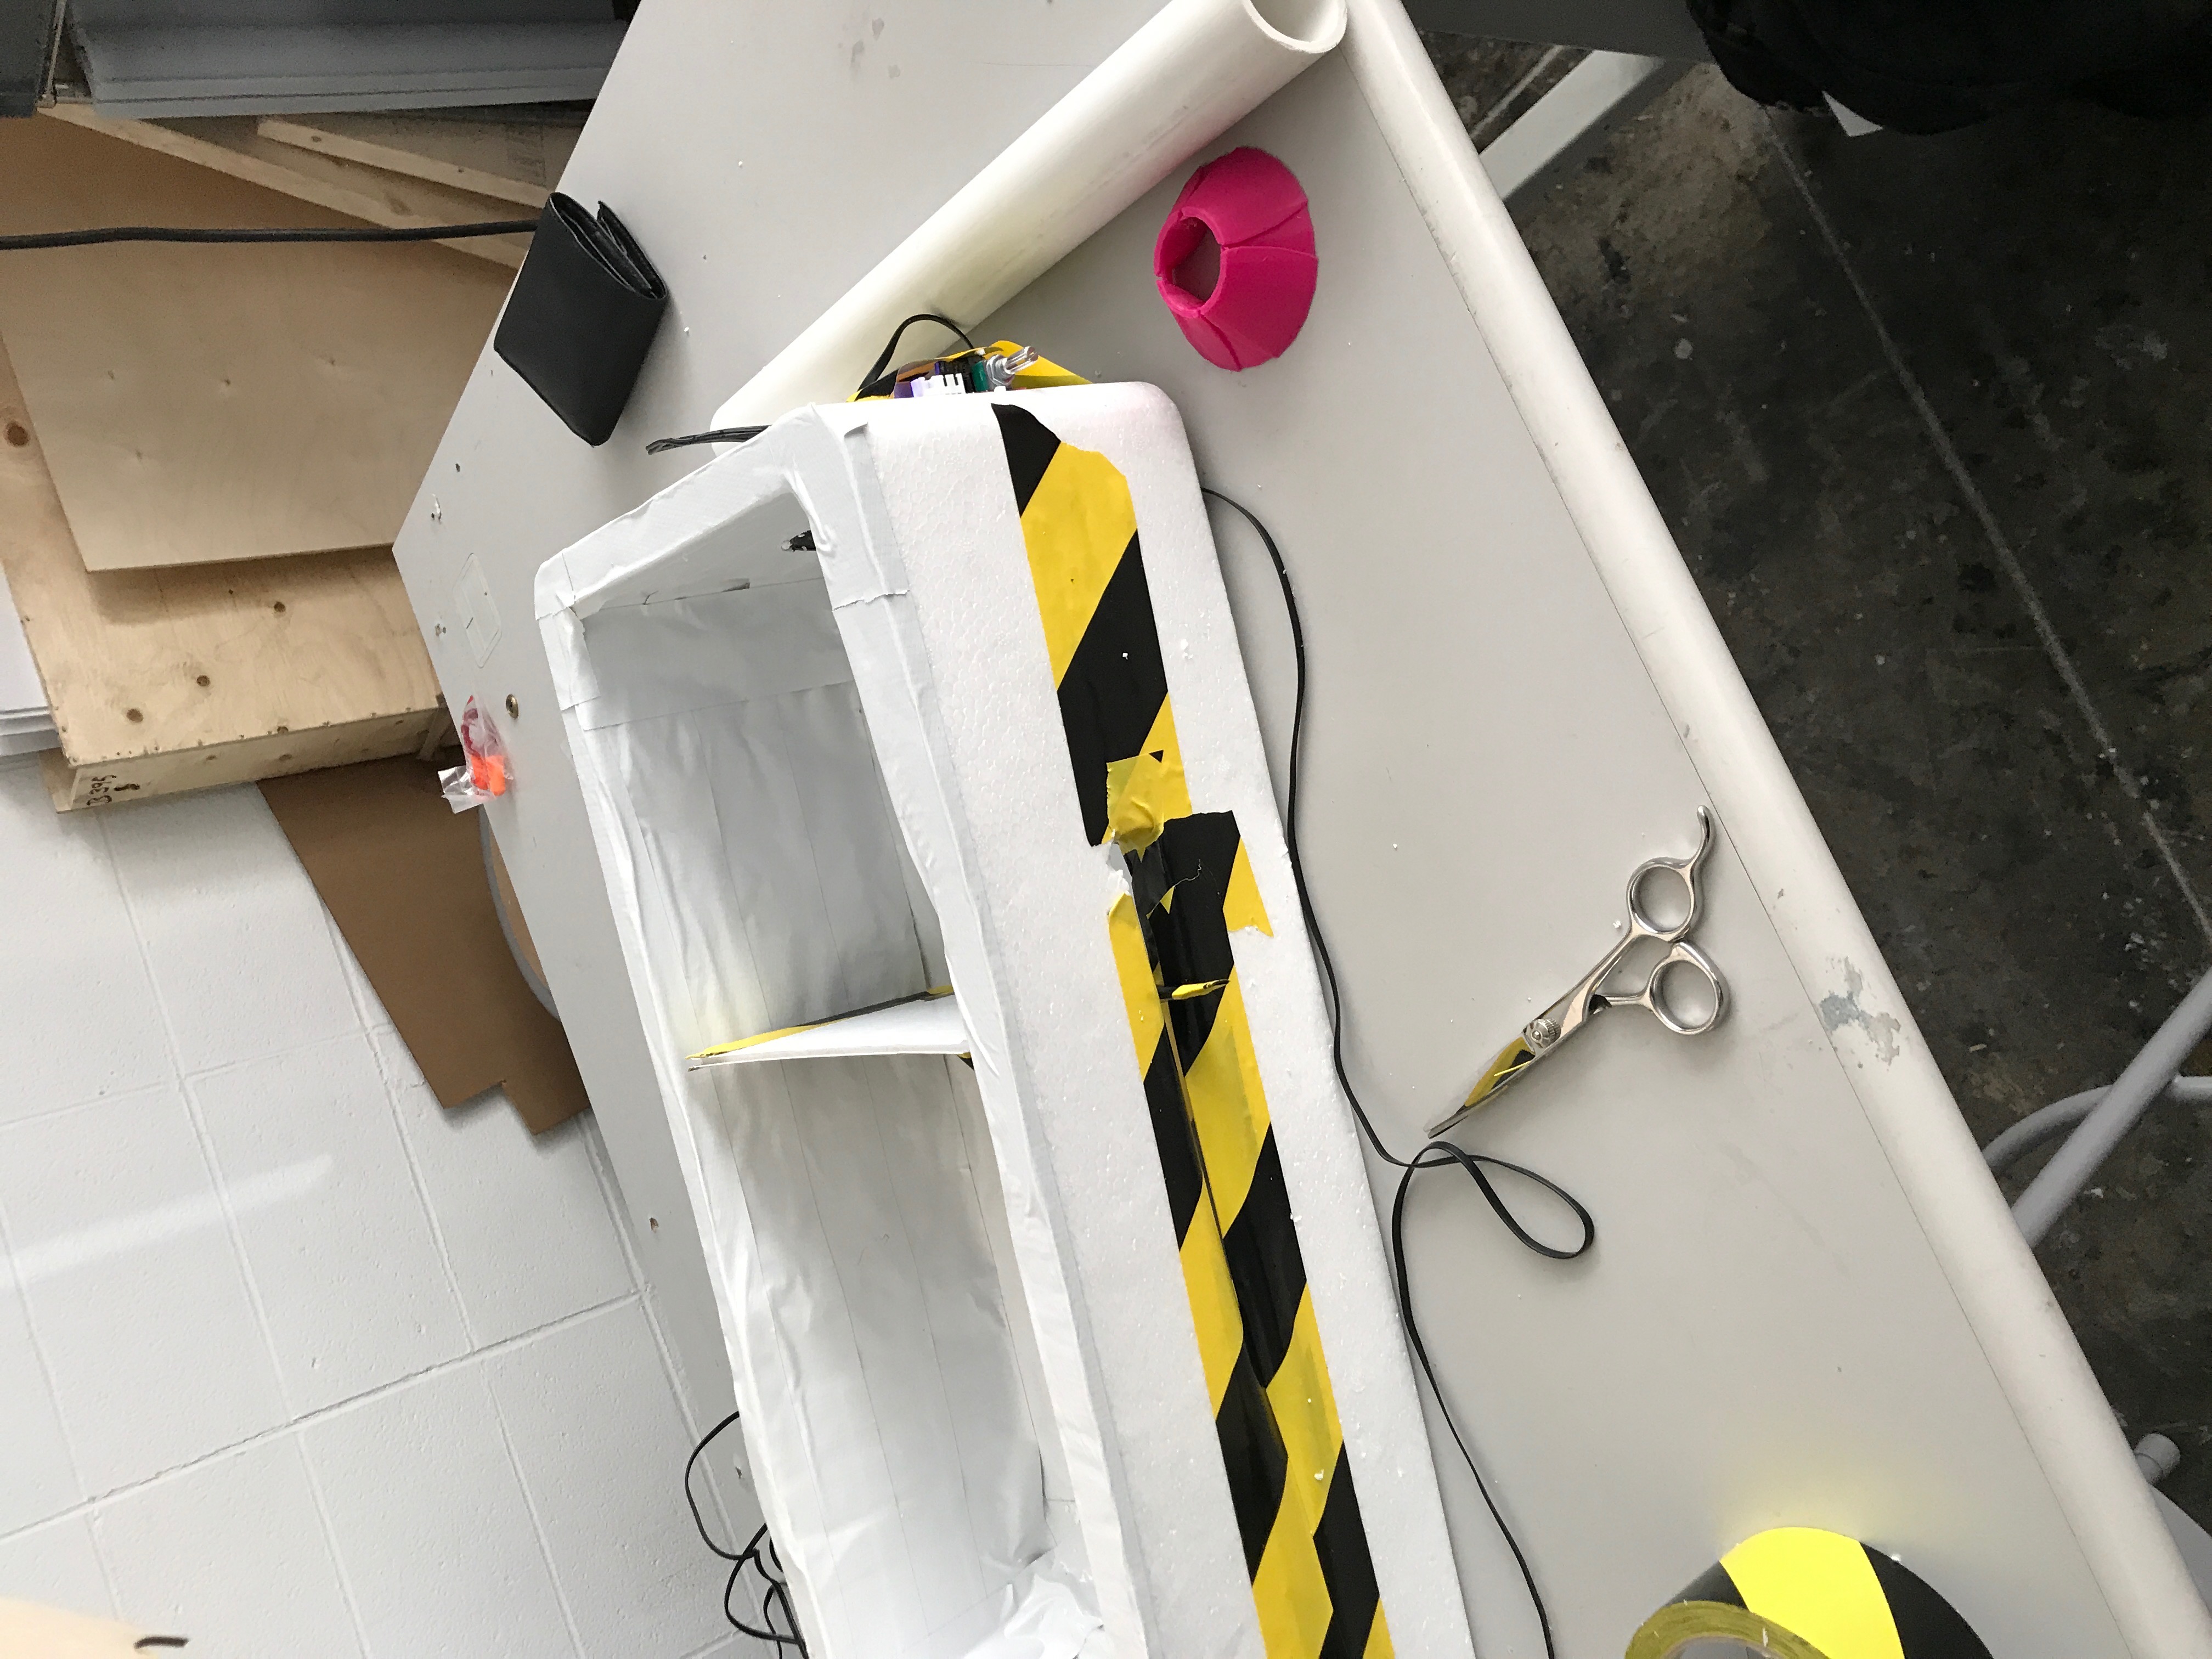
For us to accomplish this goal of variability in sound, we had to form our shape very carefully. As you can see in the picture below, we have a main base of the cactus, from which two “arms” emerge – one in an L-shape, the other being a straight arm. Additionally, we left the base of the cactus open and the top had a makeshift horn to amplify the noise emitting from the top of the cactus.

To make the experience interesting, the visitor had the option of placing the driver anywhere within the cactus – typically most chose to put it in one of the two arms (L-shaped or straight). In doing so, there were different sounds at different amplifications each time. Further, the visitors location with respect to our cactus speaker made a large difference in terms of the noise volume experienced from the cactus speaker. By placing your head in line with the base and horn of the cactus, the volume of noise was much greater than if you were outside of it, which was fun to play around with throughout the exhibition.

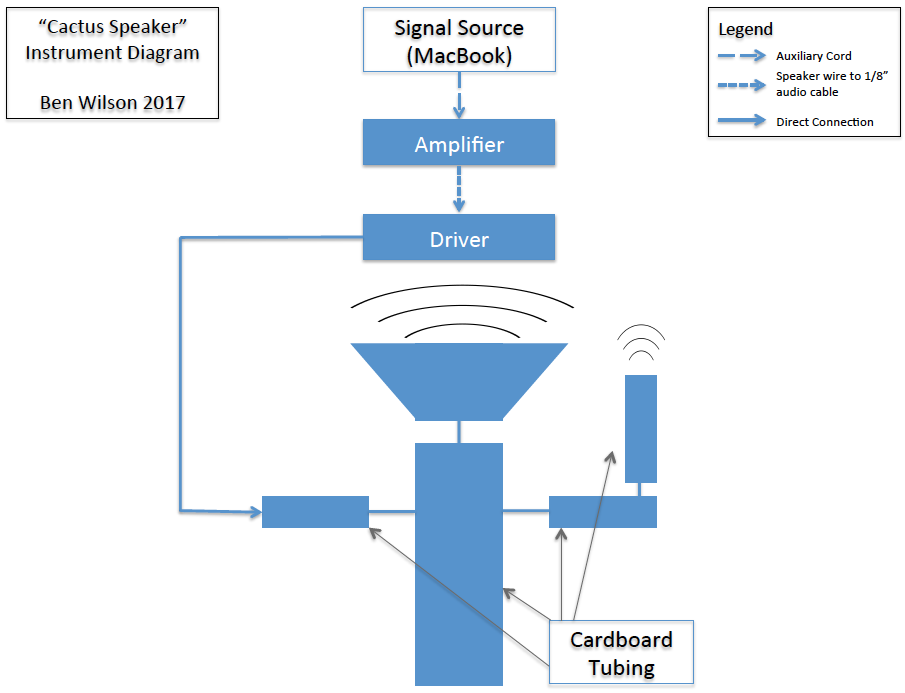
Below, you can see a more in-depth diagram that spells out the various mechanisms that we used to organize our project and accomplish our visitor experience goals. As I mentioned before, the form of the speaker contains a base, two arms and a horn at the top. Our signal source was a MacBook, which connected via auxiliary cord to an amplifier, which then connected to a driver that fed into the straight arm of the “cactus speaker.” While this is the design of our project, here, we also put the driver in various other locations of the cactus to experience with sound variability.
In analyzing our “cactus speaker” further, I was able to draw many connections with Michel Chion’s Three Modes of Listening.” Specifically, Chion speaks about three different types of listening: causal, semantic and reduced. In linking these various forms of listening to my piece, I found that each component was a part of the “cactus speaker.” For the causal, part of the listening experience was finding where exactly the best location was to hear the noise and where that noise was coming from within the cactus – there was an examination part of the piece which made the visitor as “how” and “what” after first glance. In further observation, it was interesting to move the driver within the “cactus speaker” to determine which location provided the clearest sound – a sound through which we could discern words clearly and understand all of the lyrics of a song. Lastly, there was a prevalence of reduced listening with our “cactus speaker” – listening that Chion describes as focusing “on the traits of the sound itself, independent of its cause and of its meaning.” For the “cactus speaker,” the full user experience took time to fully understand the form of the object, the location of the driver in relation to this shape, and the different types of noises that you can experience from the speaker. Like Chion explains, there were never any two identical noises that could come from the speaker, and this variability rendered itself to interpretation and diagnosis from the listener – a process that is lengthy, but also very enjoyable and educational. Overall, these three components (primarily the reduced listening) helped to make the “cactus speaker” not only an enjoyable project to create, but also an enjoyable project to experiment with and dissect through its variability of sound emission.